
Mastering User Authentication: A Step-by-Step Guide to Using Google OAuth 2.0 in Node.js with Passport.js


Introduction
Are you tired of building user authentication systems from the ground up? Do you want to benefit from the power and security of OAuth 2.0 without having to write your own code? Look no further, because we'll show you how to use Google OAuth 2.0 with Passport.js in Node.js in this step-by-step guide.
OAuth 2.0 is a popular authorization protocol that enables third-party applications to access a user's data without jeopardizing the user's login credentials. Google offers an OAuth 2.0 authentication system that is simple to integrate into any application.
Passport.js is a popular Node.js library that provides authentication middleware. It supports a variety of authentication methods, including OAuth 2.0.
We'll walk you through the process of configuring Google OAuth 2.0 authentication with Passport.js in Node.js in this tutorial. You'll learn how to create a Google API Console project, set up your Passport.js middleware, and add authentication routes to your application.
Setting up the Project
Create a Google API Console Project
Go to the Google API Console (console.developers.google.com)
Create a new project by clicking on the "Select a Project" dropdown and clicking on "New Project".
Give your project a name and click on
Create.
Step 2: Enable Google OAuth 2.0 API
Now that we have created a project, we need to enable the Google OAuth 2.0 API.
From the Dashboard, click on the
Enable APIs and Servicesbutton.Search for
Google OAuth 2.0and click on theGoogle OAuth 2.0 APIresult.Click on the
Enablebutton.
Step 3: Create Google OAuth 2.0 Credentials
Next, we need to create OAuth 2.0 credentials to authenticate our application with Google.
From the
Credentialspage, click on theCreate Credentialsbutton and selectOAuth client ID.Select
Web applicationas the application type.Enter a name for your OAuth 2.0 client ID.
Add your application's authorized JavaScript origins and redirect URIs, use http://localhost:3000 and http://localhost:3000/auth/google/callback respectively
Click on the "Create" button.
Before we dive into the code, we need to set up our project. First, we need to create a new project directory and initialize it with npm:
  mkdir myproject
  cd myproject
  npm init
Then, we need to install the required dependencies:
npm install express express-session passport passport-google-oauth20 ejs dotenv mongoose mime
Code Walkthrough
Configure googleOauth.js Middleware
To implement the Google OAuth strategy, we need to create a new file named googleOauth.js in the root directory. This file will contain the code to configure the Google OAuth strategy using the Passport module.
const GoogleStrategy = require('passport-google-oauth20').Strategy;
const GOOGLE_CLIENT_ID = 'our-google-client-id';
const GOOGLE_CLIENT_SECRET = 'our-google-client-secret';

module.exports = function(passport) {
  const userModel = require('./userModel');
  passport.use(new GoogleStrategy({
      clientID: GOOGLE_CLIENT_ID,
      clientSecret: GOOGLE_CLIENT_SECRET,
      callbackURL: "http://localhost:3000/auth/google/callback",
    },
    async (accessToken, refreshToken, profile, done) => {
      try {
        const existingUser = await userModel.findOne({ email: profile.emails[0].value });
        if (existingUser) {
          return done(null, existingUser);
        }
        const newUser = new userModel({
          googleId: profile.id,
          name: profile.displayName,
          email: profile.emails[0].value,
        });
        await newUser.save();
        done(null, newUser);
      } catch (error) {
        done(error, null);
      }
    }
  ));

  passport.serializeUser((user, done) => {
    done(null, user.id);
  });

  passport.deserializeUser(async (id, done) => {
    try {
      const user = await userModel.findById(id);
      done(null, user);
    } catch (error) {
      done(error, null);
    }
  });
};
Let's go through this code:
First, we import the
GoogleStrategyfrom thepassport-google-oauth20module.Next, we export a function that takes in
passportas an argument. Inside this function, we require theuserModelmodule that we created earlier.We then use the
passport.use()function to configure the Google OAuth 2.0 strategy. We provide theclientID,clientSecret, andcallbackURLvalues from the environment variables that we set earlier.The second argument to the
passport.use()function is a callback function that is called when a user successfully logs in with Google. Inside this function, we first check if the user already exists in our database using thefindOne()function from Mongoose. If the user exists, we return the user object. If the user doesn't exist, we create a new user object and save it to the database.We then call the
done()function with thenewUserobject as the second argument. This will pass the user object to the next middleware.The
passport.serializeUser()andpassport.deserializeUser()functions are used to store the user object in the session. When a user logs in, Passport.js serializes the user object and stores it in the session. When a user makes a subsequent request, Passport.js deserializes the user object and attaches it to the request object. This allows us to access the user object in subsequent middleware.
Setting up the routes
Now that we have implemented the authentication strategy, we need to create the routes for the login page, logout functionality, and the dashboard page.
we will create a new file called auth.js and define our authentication routes in it. In the auth.js file, we will import the express and passport modules and create an instance of the Router object from the express module.
const express = require('express');
const passport = require('passport');

const router = express.Router();
We will then define our routes using the router object. We will start by defining a route for the Google OAuth 2.0 authentication. The route will be accessed when the user clicks the "Login with Google" button. In this route, we will use the passport.authenticate method to initiate the Google authentication process.
router.get('/auth/google', passport.authenticate('google', {
  scope: ['profile', 'email'],
}));
The passport.authenticate method takes two arguments: the first argument is the name of the authentication strategy that we defined earlier, and the second argument is an object that specifies the scopes that we want to request from the user. In this case, we are requesting the user's profile and email.
After the user is authenticated by Google, Google will redirect them back to our application. We need to define a second route to handle this redirect. In this route, we will use the passport.authenticate method again, but this time we will pass in an additional object that specifies the failureRedirect property. If the authentication fails, the user will be redirected to the root of our application.
router.get('/auth/google/callback', passport.authenticate('google', {
  failureRedirect: '/',
}), (req, res) => {
  res.redirect('/dashboard');
});
After the user is authenticated and redirected to our application, we will redirect them to the dashboard page. We will define a third route for the dashboard page. In this route, we will render the dashboard view and pass in the authenticated user's information.
router.get('/dashboard', async (req, res) => {
  if (!req.user) {
    return res.redirect('/');
  }
  const user = await userModel.findById(req.user.id);
  res.render('dashboard', { user });
});
Finally, we will define a logout route that logs the user out of the application and redirects them to the root of the application.
router.get('/logout', function(req, res){
    req.logout(function(err){
      if(err) return next(err);
      res.redirect('/');
    });
});
Injex.js Setup
The first line of code requires the Express.js framework, which is a popular web application framework in Node.js. The next three lines of code require the necessary packages for session management, passport authentication, and path manipulation. The authRoutes, passportConfig, userModel, and dbConfig files are required, which contain the necessary configuration settings and routes for handling user authentication and database interactions.
const express = require('express');
const session = require('express-session');
const passport = require('passport');
const path = require('path')
const mime = require('mime');

const authRoutes = require('./auth');
const passportConfig = require('./googleOauth');
//Importing the user model schema
const userModel = require('./userModel');
// importing the database configuration
const dbConfig = require('./dbConfig')

const app = express();

dbConfig()
Next, the view engine and the view directory are set up using the app.set() method. The ejs view engine is used, and the views are located in the views directory.
app.set('view engine', 'ejs');
app.set('views', path.join(__dirname, 'views'))
The static middleware is set up to serve static files from the views directory. The setHeaders method is used to set the Content-Type header based on the MIME type of the requested file.
app.use(express.static(path.join(__dirname, 'views'), {
  setHeaders: (res, path) => {
    const contentType = mime.getType(path);
    res.set('Content-Type', contentType);
  },
}));
Session middleware is set up using the express-session package, which provides session management capabilities. The 'SESSION_SECRET' variable is used as the session secret and the resave and saveUninitialized options are set to false and true, respectively.
app.use(session({
  secret: 'SESSION_SECRET',
  resave: false,
  saveUninitialized: true,
}));
Passport middleware is set up using the passport.initialize() and passport.session() methods. The passportConfig() function is called to configure the Google OAuth2 authentication strategy. The authRoutes file is used as middleware for the root route of the application.
An endpoint is created for the /dashboard route, which renders the dashboard view. The userModel is used to retrieve the user's information, which is then passed to the view for rendering.
app.use(passport.initialize());
app.use(passport.session());

passportConfig(passport);
app.use('/', authRoutes);

authRoutes.get('/dashboard', async (req, res) => {
  if (!req.user) {
    return res.redirect('/');
  }
  const user = await userModel.findById(req.user.id);
  res.render('dashboard', { user });
});
Finally, the server is started on port 3000 using the app.listen() method.
app.listen(3000, () => {
  console.log('Server started on port 3000');
});
Client-side Code
There are two view files in this application: login.ejs and dashboard.ejs.
The login.ejs file is a simple HTML file that contains a login button that redirects the user to the Google OAuth2 authentication page when clicked. The login button is wrapped in an anchor tag that has an href attribute set to "/auth/google", which is the URL for the authentication route defined in the auth.js file. The login.ejs file also includes a CSS file named "styles.css" for styling purposes.
<!DOCTYPE html>
<html>
<head>
    <title>Login with Google</title>
    <link rel="stylesheet" type="text/css" href="./styles.css">
</head>
<body>
    <div class="container">
        <div class="google-logo"></div>
        <h1>Login with Google</h1>
        <a href="/auth/google"><button class="btn">Login with Google</button></a>
    </div>
</body>
</html>
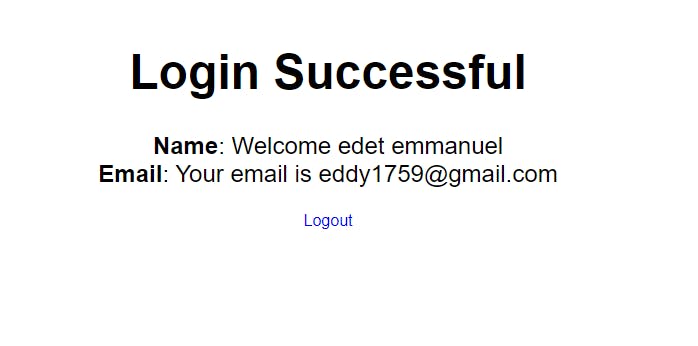
The dashboard.ejs file is a HTML file that displays the user information after successful authentication. The user information is displayed using embedded JavaScript (ejs) that extracts the user's name and email from the user object passed in the render() function. The logout button is also included in the file with an anchor tag pointing to "/logout" which is the URL for the logout route defined in the auth.js file.
<!DOCTYPE html>
<html>
<head>
    <title>Login Successful</title>
    <link rel="stylesheet" type="text/css" href="./styles.css">
    <title>Dashboard</title>
</head>
<body>
    <div class="container">
        <h1>Login Successful</h1>
        <p>
            <strong>Name</strong>: Welcome <%= user.name %><br>
            <strong>Email</strong>: Your email is <%= user.email %><br>
        </p>
    </div>
    <a href="/logout">Logout</a>
</body>
</html>
We have finished building our social login page, let's run the application by below command
node index.js
Once our server is running, we can see our social login page on http://localhost:3000/
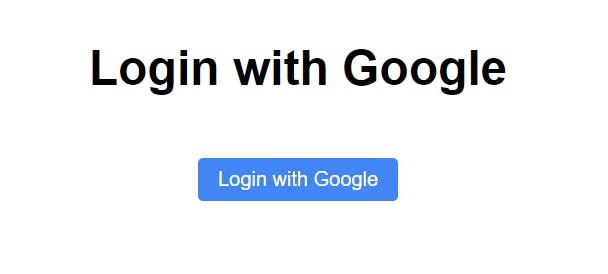
We need to click on SignIn with Google button, which will redirect us to the google login page.
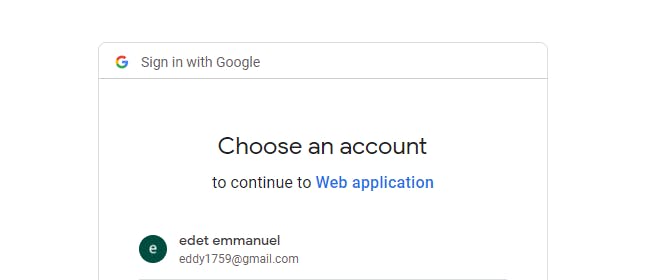
After login with our google credentials, it will redirect back to our application and on the dashboard page, we can see the details of the logged-in user and can save this detail in a database for future use also.
Conclusion
In this article, we explained the Node.js and Express.js code used to create a web application that allows users to log in using their Google account. We explained the server-side code in detail, including the middleware used for authentication and session management. We also provided an overview of the client-side code, which includes the login.ejs and dashboard.ejs files that render the login and dashboard pages, respectively.
You can found the complete code used in this tutorial on our Github Repo